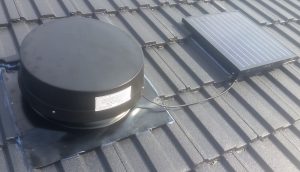
Installing Solazone solar roof ventilators
Installing Solazone solar roof ventilators, should be professionally done so there are no leaks, and the operation is successful for years to come.
Here are some of the important points that need to be observed for a safe and satisfactory installation.
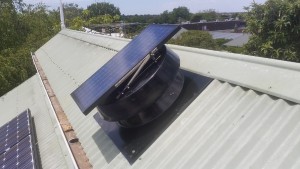
Installing Solazone solar roof ventilators on corrugated metal roofs.
- Select the desired position on the roof, taking into account that the hottest air inside the roof will normally be at the top.
- Consider whether you want most ventilation to occur early in the day (east-facing), the middle of the day (north-facing), or later in the day (west-facing)
- The top flange of the Solazone solar ventilator base should be slid under the ridge capping sufficiently that it will prevent water ingress due to rain and splashing. This will give the vertical position of the solar roof ventilator. Draw two lines on the roof either side of the solar roof ventilator, marking the height of the centre of the ventilator duct.
- Work out laterally where the solar roof ventilator is to go, and mark the centre of the duct above and below the ventilator.
- Remove the ventilator and join the lines. Where they cross indicates the centre of the hole.
- Generally it is best to select the top of a rib or bottom of a trough to centre the cross.
- When the exact position of the ventilator has been determinined, accurately draw the outline on the roof with a marker pen.
- Remove the long tek screws from the ridge capping so that the ridge capping may be lifted to easily slide the solar roof ventilator flange underneath.
- Retain the screws and seals for replacing when the solar roof ventilator is in place.
- Measure the duct diameter and draw the duct hole on the roof.
- Cut the hole using tin snips, a steel cutting blade, or a nibbler. (The nibbler will leave swarf on the roof that needs to be cleaned up to prevent it rusting the roof)
- Connect the night pack leads to the ventilator and dangle it inside the roof.
- Now is the time to set the temperatures of the adjustable thermostat (if fitted)
- Apply silicone roof sealant to the top of the top flange of the ventilar base where it goes under the ridge cap, and also along the top of the outermost corrugations on each side, that will be under the ventilator side flanges.
- Cut and install corrugated foam packing across the bottom of the duct hole to prevent air and water leakage, sealing it with silicone.
- Align and install the ventilator under the ridge cap, and screw it in place using the original roof screws into the ridge cap and through the ventilator flange. Do not overtighten these, just until the sealmakes contact.
- Install short tek screws provided through the side flanges and into the top of the corrugation underneath.
- Adjust the tilt angle of the solar panel, and ensure that all of the stainless steel screws and nuts are tight.
- The ventilator should now run,
- Go inside the roof and connect the AC adaptor to 240v power (for night time use)
- Test for night pack operation by switching on and off the power. Unless there is full sunlight, you should be able to hear the fan speed change.
- Give the customer the Owners Manual, and ensure that the operation is understood.
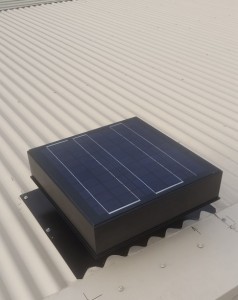
Installing Solazone Alley Cat solar roof ventilators on tile roofs.
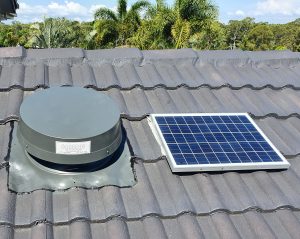
The recommended model for tile roofs is the Solazone Alley Cat. This has a malleable soft aluminium base that can be shaped to the tiles to prevent air and water leaks.
- Select the desired position on the roof, taking into account that the hottest air inside the roof will normally be at the top.
- Consider whether you want most ventilation to occur early in the day (east-facing), the middle of the day (north-facing), or later in the day (west-facing)
- We normally select the third row of tiles from the top of the roof for the installation, to prevent disturbing the concrete at the ridge cap.
- The installation will require removing one or two tiles for ventilation, and the second tile will need to be cut in half and replaced.
- This will determine laterally where the solar roof ventilator is to go, and another tile nearby will need to be removed in order to be able to secure the ventilator.
- Connect the night pack leads to the ventilator (if used) and dangle it all inside the roof.
- Now is the time to set the temperatures of the adjustable thermostat (if fitted)
- Connect the solar panel wire to the solar ventilator connection. Usually this will also go inside the roof.
- Install one or two metal retaining strips to the ventilator and attach to a convenient rafter or batten, to secure it with tek screws.
- Install the solar panel somewhere on the roof, using metal mounting strips to the battens, and connect the solar panel wire. This may travel inside the roof.
- Alternatively, the solar panel may be installed on the solar ventilator hood, using the black brackets provided.
- Finally, mould the ventilator skirt to the shape of the tiles with a soft mallet, and silicone the flasing thoroughly with quality black silicone sealant.
- The ventilator can now run,
- Go inside the roof and connect the AC adaptor to 240v power (for night time use)
- Test for night pack operation by switching on and off the power. Unless there is full sunlight, you should be able to hear the fan speed change.
- Give the customer the Owners Manual, and ensure that the operation is understood.