
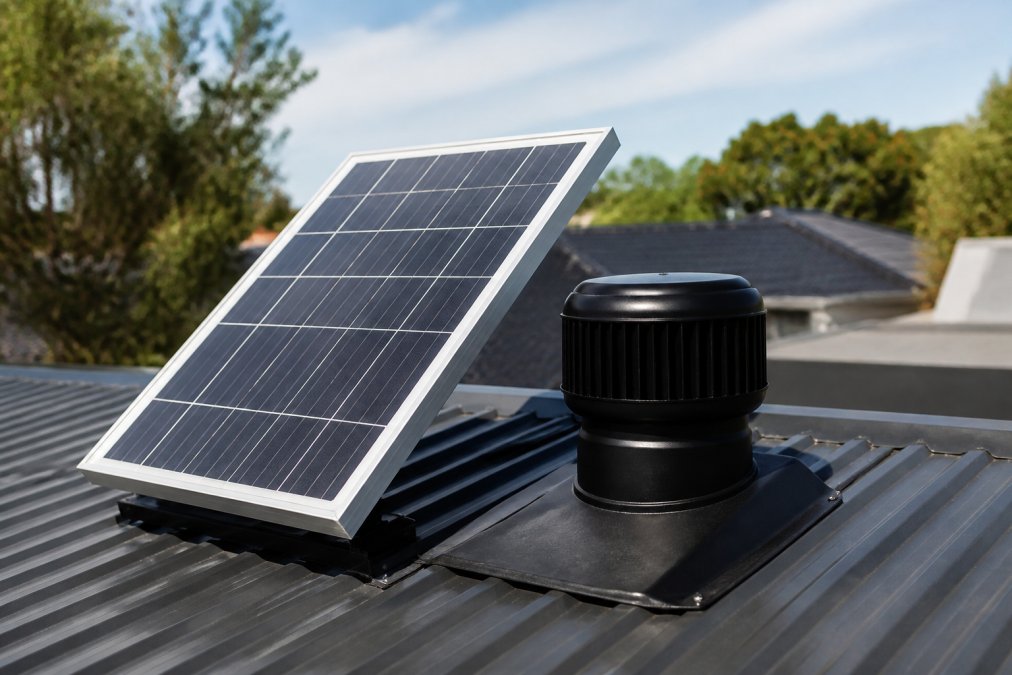
Table of Contents
- Why solar ventilation for damp subfloors matters
- How solar-powered subfloor ventilation systems work
- Diagnosing subfloor moisture: signs and soil testing methods
- Subfloor ventilation systems Australia: types and options
- National Construction Code subfloor ventilation requirements
- DIY subfloor ventilation Australia: installation overview
- Cost of subfloor ventilation Australia and long-term ROI
- Ventilation placement optimisation and smart monitoring
Last Updated: July 31, 2026
Moisture accumulation beneath a home creates a cascade of problems that most homeowners don’t notice until significant damage occurs. Subfloor dampness reduces structural integrity, accelerates wood rot, and creates ideal conditions for mould growth. At Solazone Australia, we’ve worked with thousands of homeowners across Melbourne and the Sunshine Coast who discovered that solar ventilation for damp subfloors offers a practical, energy-free solution.
Why solar ventilation for damp subfloors matters
Subfloor moisture is a structural threat that compounds over time. Stagnant air traps moisture-laden air against timber joists, concrete slabs, and soil surfaces. Traditional passive foundation vents depend entirely on thermal buoyancy and wind patterns; on still days, airflow slows to almost nothing.
Solar ventilation changes this equation. By adding active extraction powered by solar panels, you create consistent, predictable airflow that removes moisture-laden air regardless of weather conditions. The system runs whenever sunlight hits the panel, most days of the year in Australia, without drawing a single watt from your mains electricity supply.
A common mistake is assuming that opening a few foundation vents will solve subfloor dampness. Passive ventilation works only when conditions align. Solar-powered fans guarantee active extraction every sunny day, which is when moisture evaporation is highest.
How solar-powered subfloor ventilation systems work
Active extraction systems use a small solar panel to power a brushless fan that pulls moisture-laden air out of the subfloor space. The stronger the sunlight, the faster the fan runs, ideal because hot, sunny days are when soil moisture evaporation peaks.
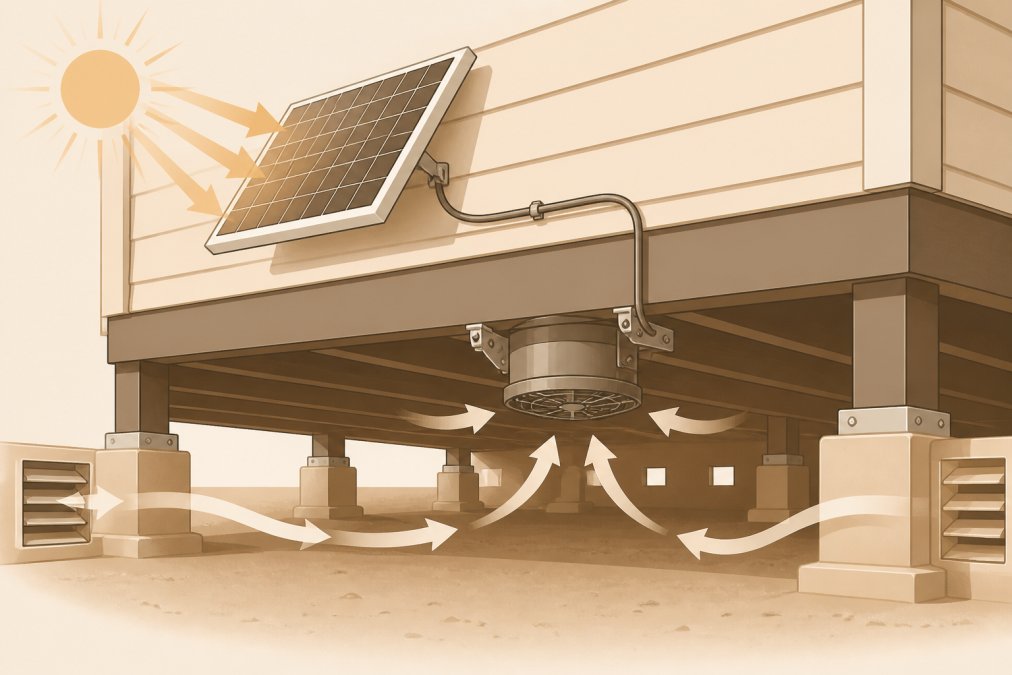
Active extraction vs. passive ventilation
Passive foundation vents work through thermal buoyancy and wind pressure. On windless, mild-temperature days, passive ventilation becomes nearly static. Relative humidity in the subfloor can climb to 70-80%, the threshold where mould growth accelerates.
(/solar-ventilation-heating/solar-sub-floor-ventilators/) work]
Active extraction removes this dependency. Most residential systems move 200-600 cubic metres per hour, compared to passive vents that might manage 50-150 cubic metres per hour on a good day.
Airflow circulation and moisture removal
Effective moisture removal depends on the fan’s capacity and the layout of intake and exhaust points. Cross-flow ventilation positions intake vents on one side of the subfloor and exhaust fans on the opposite side, creating directional flow that sweeps across the entire subfloor.
Moving air accelerates evaporation from soil surfaces and timber. As relative humidity drops below 60%, mould growth slows dramatically. Below 50%, it stops almost entirely.
Diagnosing subfloor moisture: signs and soil testing methods
Before installing any ventilation system, confirm that moisture is actually the problem and understand its severity.
Identifying musty odours and visible dampness
Musty odours indicate active microbial growth in the subfloor environment. This smell often seeps into living spaces above, particularly in bedrooms or lounges directly over the subfloor.
Visible dampness on timber joists, concrete footings, or soil surfaces confirms moisture presence. Look for discolouration, soft spots in timber (indicating early-stage rot), or white powdery deposits on concrete (efflorescence, signalling water movement through the slab). Mould growth appears as dark patches, usually black or grey, on timber and damp soil.
If you press a timber joist with your thumbnail and it leaves an indentation, the wood has absorbed moisture and begun to soften, subfloor rot in its early stages.
If you notice soft timber or extensive mould growth, address it before installing ventilation. Ventilation removes future moisture accumulation, but it won’t reverse existing rot. Damaged timber may need replacement, and active mould growth may require treatment before airflow alone can resolve it.
Measuring relative humidity and moisture barriers
Relative humidity in the subfloor is the key metric. You can measure it with an inexpensive digital hygrometer (often under $20). Place the meter in the subfloor for 10-15 minutes to get a stable reading.
- Below 50% relative humidity: mould growth is unlikely
- 50-60%: borderline; some mould risk exists
- 60-75%: active mould risk; conditions favour growth
- Above 75%: severe risk; mould will establish quickly
If your subfloor reads above 60% relative humidity on a dry day, moisture control is necessary. A soil moisture meter measures moisture content in the soil directly beneath the subfloor. Readings above 25-30% moisture content indicate that the soil is wet enough to release significant vapour into the subfloor space.
| Diagnostic Test | What It Measures | Target Reading | What It Tells You |
|---|---|---|---|
| Relative humidity (hygrometer) | Air moisture in subfloor | Below 60% | Ventilation is adequate |
| Soil moisture meter | Water content in soil | Below 25% | Ground isn’t contributing excess moisture |
| Visual timber inspection | Wood softness and rot | No indentation on pressure | Timber hasn’t begun to decay |
| Mould presence | Active growth | None visible | Conditions aren’t favouring mould |
Subfloor ventilation systems Australia: types and options
Australian homes use two primary approaches to subfloor ventilation: passive foundation vents and active solar-powered extraction systems.
Solar fans vs. passive foundation vents
Passive foundation vents are simple brick or metal grilles installed in the external walls of the subfloor space, typically spaced every 1.5-2 metres around the perimeter. They cost $20-50 per vent and require no maintenance or power.
Solar-powered fans add active extraction. A typical residential solar fan system includes a small solar panel (usually 5-10 watts), a brushless fan motor, and ductwork to direct airflow. Systems run continuously during daylight hours without any connection to mains electricity. The best systems include a one-way check valve to prevent backflow when the sun sets.
Homes with poor drainage, high water tables, or extended periods of cloud cover benefit dramatically from active extraction. Homes in drier climates with excellent drainage sometimes manage with passive vents alone, but adding a solar fan provides insurance against seasonal moisture spikes.
| Ventilation Type | Upfront Cost | Running Cost | Best For | Limitations |
|---|---|---|---|---|
| Passive vents | Low ($20-50 each) | None | Dry climates, good drainage | Weak airflow on still days |
| Solar fan system | Moderate | None (solar powered) | High moisture, poor drainage | Requires sunny location for panel |
| Combination (passive + solar) | Moderate | None | Most Australian homes | Slightly more complex installation |
Choosing the right fan capacity and air exchange rate
Fan capacity is measured in cubic metres per hour (m³/h). Residential systems typically range from 200-600 m³/h. Aim for at least 5-10 air changes per hour for the total subfloor volume. Most residential homes need 300-500 m³/h, which is achievable with a single solar fan for spaces up to 100-150 square metres.
For larger homes or complex layouts, multiple fans positioned at opposite ends create cross-flow ventilation and ensure no dead zones.
National Construction Code subfloor ventilation requirements
Australia’s National Construction Code (NCC) requires subfloor ventilation openings with a minimum total area of 1/150th of the subfloor area, distributed around the perimeter. For a 150-square-metre subfloor, this means at least 1 square metre of ventilation openings total.
However, the Code’s passive ventilation requirement assumes ideal conditions: consistent wind, temperature differences between inside and outside, and no blockages in ductwork. In reality, many homes don’t meet these conditions consistently. Adding solar ventilation exceeds the Code requirement and provides a safety margin that passive vents alone cannot guarantee.
For homes built before the NCC was updated (pre-2016 in many states), older standards applied lower ventilation requirements. If your home is older and you’re experiencing moisture problems, upgrading to solar ventilation can bring your subfloor environment closer to current Code expectations.
DIY subfloor ventilation Australia: installation overview
Installing a solar ventilation system is within reach for homeowners with basic DIY skills, though professional installation is recommended for complex layouts or homes with difficult access.
What you’ll need before starting
Before you begin, gather these materials and tools:
- Solar panel and fan unit (complete kit from a supplier)
- Ductwork or flexible ducting (typically 100-150mm diameter)
- Intake and exhaust grilles
- Mounting brackets and fasteners
- Weatherproof sealant and tape
- Basic hand tools: screwdriver, wrench, tape measure, drill
- Safety equipment: work gloves, dust mask, headlamp for subfloor work
You’ll also need to identify the optimal location for the solar panel (north-facing for maximum sunlight exposure in Australia) and plan the ductwork route from intake vents to the fan and out through an exhaust vent.
Step-by-step installation process
Step 1: Plan the layout (30 minutes)
Map out your subfloor, marking existing vents and identifying the best location for the solar panel. The panel should face north in Australia to capture maximum sunlight. Identify intake points (usually at the lowest point of the subfloor) and exhaust points (typically higher or on the opposite side from intakes).
Step 2: Install intake vents (1-2 hours)
Cut openings in the subfloor walls or foundation where intake air will enter. Install intake grilles, which prevent debris and pests from entering the subfloor while allowing air to flow freely. Seal around the grille edges with weatherproof sealant.
Step 3: Mount the solar panel (1 hour)
Secure the solar panel to the roof or an external wall where it receives unobstructed sunlight for at least 6-8 hours daily. Use mounting brackets rated for your roof type. Ensure the panel is angled to face true north (roughly 30-35 degrees in most of Australia).
Step 4: Run ductwork from intake to fan (2-3 hours)
Lay flexible ductwork from intake vents to the fan location. Secure it with cable ties or straps to prevent sagging. Minimize bends and keep the run as straight as possible to reduce airflow resistance.
Step 5: Install the fan in the subfloor (1-2 hours)
Mount the fan unit in the subfloor space, typically near the centre or at the end opposite intake vents. Ensure it’s secure and won’t vibrate. Connect the ductwork from the intake side to the fan inlet.
Step 6: Run exhaust ductwork and install exhaust vent (1-2 hours)
Connect ductwork from the fan outlet to an external exhaust vent. This vent should be positioned high enough that moist air exits well away from the subfloor and won’t re-enter through intake vents. Install a one-way check valve on the exhaust line to prevent backflow when the fan stops.
Step 7: Connect the solar panel to the fan (30 minutes)
Run the electrical cable from the solar panel to the fan motor. Most kits use simple plug connectors, no wiring knowledge is needed. Secure the cable along the roof or wall to prevent damage.
Step 8: Test the system (15 minutes)
On a sunny day, observe the fan running. You should feel airflow at the exhaust vent. Check that intake vents are drawing air (place a light tissue near the vent, it should move slightly inward).
The entire installation typically takes 8-12 hours for a single-fan system in a straightforward subfloor layout. Complex homes with multiple levels or difficult access may take 16-20 hours. If you’re uncomfortable working in confined spaces or at heights, professional installation is worth the cost.
Common installation mistakes to avoid
Mistake 1: Placing the solar panel in a shaded location. Even partial shading from trees or neighbouring buildings cuts fan speed dramatically. Ensure the panel has clear, unobstructed access to sunlight for at least 6-8 hours daily.
Mistake 2: Undersizing the fan capacity. Choosing a fan rated too low means the system won’t achieve adequate air exchange rates. Calculate your subfloor volume and choose a fan that delivers at least 5 air changes per hour.
Mistake 3: Blocking intake vents with debris or insulation. Keep intake areas clear and inspect them seasonally.
Mistake 4: Running exhaust ductwork downward without a slope. Always slope exhaust ducts slightly upward toward the exit to prevent condensation from collecting inside the duct.
Mistake 5: Placing intake and exhaust vents too close together. Separate intake and exhaust by at least 2-3 metres to prevent recirculation of moist air.
Cost of subfloor ventilation Australia and long-term ROI
Solar ventilation systems deliver value across two dimensions: the immediate cost of installation and the long-term savings from preventing structural damage.
Energy efficiency and running costs
The primary financial advantage of solar ventilation is that it costs nothing to run. Unlike electric fans, which draw 50-100 watts continuously, solar fans are powered entirely by sunlight. In Australia’s climate, a typical solar fan runs 4-6 hours daily during winter and 8-10 hours daily during summer, all without touching your electricity bill.
For comparison, an electric exhaust fan running 8 hours daily at 75 watts costs roughly $50-60 per year in electricity. Over a 20-year lifespan, that’s $1,000-1,200 in running costs alone. A solar system eliminates this expense entirely.
Structural health savings and payback period
Homes with chronic subfloor dampness experience accelerated timber decay, compromised structural integrity, and rising damp that migrates into walls and living spaces. The cost of addressing these issues, replacing rotted joists, treating rising damp, remediating mould, often exceeds $10,000 for moderate cases and $20,000+ for severe damage.
A solar ventilation system installation typically costs between $1,500-3,500 for a standard residential home, depending on system size, ductwork complexity, and whether you hire professionals or do the work yourself. This investment prevents moisture-related damage that would cost 5-10 times as much to repair. For homes in high-moisture areas, the system often pays for itself within 5-10 years through avoided damage alone.
Ventilation placement optimisation and smart monitoring
The effectiveness of any ventilation system depends heavily on placement strategy. A well-positioned system with optimised airflow layout will outperform a poorly positioned system with twice the fan capacity.
Strategic ductwork and cross-flow ventilation layout
Cross-flow ventilation creates directional airflow that sweeps across the entire subfloor space. This layout positions intake vents on one side of the home and exhaust fans on the opposite side, with ductwork running the length of the subfloor.
Ductwork placement matters as much as fan capacity. Ducts should run as straight as possible to minimise airflow resistance. Every 90-degree bend reduces effective airflow by 10-15%.
Before finalising ductwork layout, walk through your subfloor and identify the highest-moisture areas, usually near downpipes, in corners with poor drainage, or where soil moisture is visibly higher. Position intake vents to pull air from these problem areas first.
Integration with smart home moisture monitoring
Modern smart home systems can now monitor subfloor moisture in real time, sending alerts if relative humidity climbs above target thresholds. Wireless hygrometers placed in the subfloor connect to smartphone apps, allowing homeowners to track moisture trends without entering the subfloor space.
Some advanced systems integrate solar fan operation with moisture data. If humidity drops consistently with the fan running, you have confirmation the system is working. If humidity remains high even during sunny days when the fan should be running at full speed, it signals a problem.
Subfloor moisture is preventable, and the longer you wait to address it, the more expensive the eventual repairs become. Solar ventilation for damp subfloors removes the guesswork, it runs automatically whenever sunlight is available, removing moisture continuously without drawing power from your home’s electricity supply. At Solazone Australia, we’ve helped thousands of homeowners across Melbourne and the Sunshine Coast eliminate musty odours, prevent mould growth, and protect their structural integrity with solar-powered ventilation systems. With over 40 years of technical expertise and a commitment to Australian-made equipment, we design systems tailored to your home’s specific moisture challenges. Contact Solazone Australia today to assess your subfloor condition and discover how solar ventilation can protect your home for decades to come.
Frequently Asked Questions
How does solar ventilation for damp subfloors actually work?
Solar ventilation uses photovoltaic panels to power extraction fans that pull moisture-laden air from beneath your home. The fan creates active airflow circulation, drawing out subfloor moisture and replacing it with fresh air. Unlike passive ventilation, solar systems operate continuously during daylight, maintaining consistent air exchange rates and preventing condensation buildup that causes mould and structural rot.
What are the main signs my subfloor has a moisture problem?
Common indicators include musty odours in rooms above, visible mould or discolouration on joists, soft or spongy timber, rising damp on walls, and increased relative humidity indoors. You can also check for dampness by placing moisture meters in the subfloor space or conducting soil moisture testing beneath your home. Early detection prevents expensive structural damage and health issues from mould growth.
What does the National Construction Code say about subfloor ventilation?
The National Construction Code requires adequate underfloor ventilation to manage moisture and prevent timber decay. Requirements specify minimum ventilation openings based on subfloor area and soil type, and mandate moisture barriers in certain conditions. Solar ventilation systems can exceed these baseline requirements, providing active moisture control rather than relying solely on passive foundation vents, particularly beneficial in high-moisture climates like Melbourne and the Sunshine Coast.
Can I install solar subfloor ventilation myself, or do I need a professional?
DIY installation is possible if you're comfortable with basic tools and have adequate subfloor access, but professional installation ensures correct ductwork placement, optimal fan capacity selection, and compliance with National Construction Code requirements. Improper installation can reduce effectiveness and void warranties. Consider your subfloor clearance, soil conditions, and local building regulations before deciding. Solazone Australia offers professional assessment and installation to guarantee proper ventilation placement and long-term performance.
This article was written using GrandRanker