
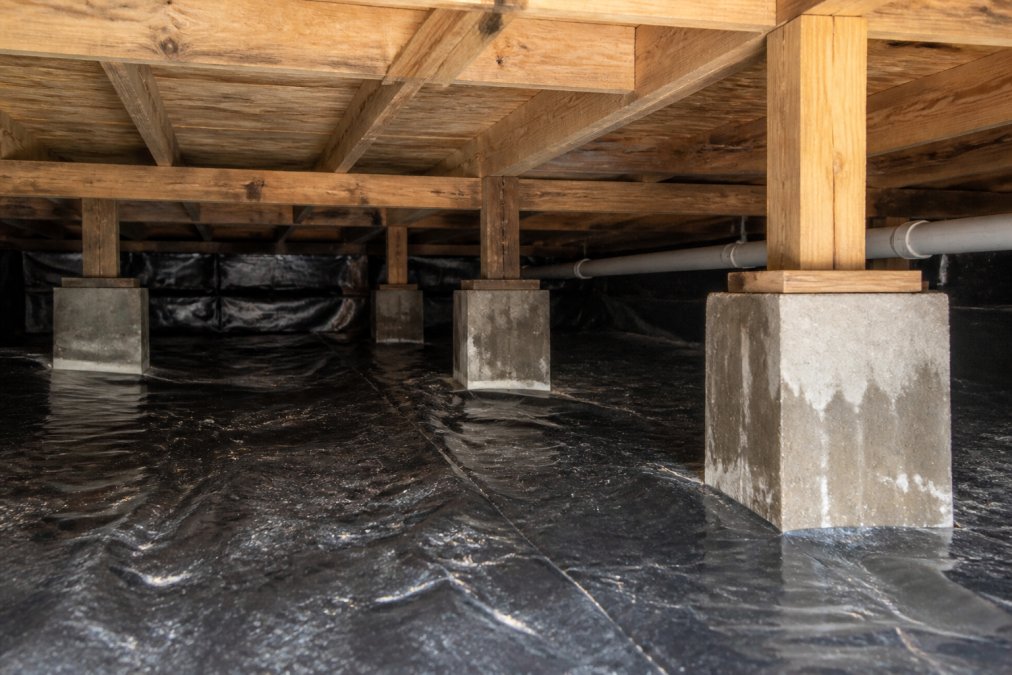
Table of Contents
- What Causes Subfloor Dampness in Australian Homes
- Signs of Rising Damp in Timber Floors and Subfloors
- Step 1: Clear Ventilation Blockages and Improve Subfloor Airflow
- Step 2: Install a Polyethylene Moisture Barrier
- Step 3: Manage External Ground Levels and Drainage
- Best Subfloor Fans for Moisture Control and Ventilation
- Health Implications of Subfloor Mould and Moisture
- Maintenance Schedule to Prevent Subfloor Dampness
Last Updated: August 4, 2026
How to stop subfloor dampness is one of the most pressing challenges facing Australian homeowners, particularly in regions like Melbourne and the Sunshine Coast where humidity and rainfall create ideal conditions for moisture infiltration. Subfloor moisture compromises structural integrity, fosters mould growth, triggers musty odours, and poses health risks. Effective solutions combine ventilation improvements, moisture barriers, and drainage management. Below are seven proven methods to eliminate subfloor dampness.
What Causes Subfloor Dampness in Australian Homes
The root causes fall into three categories: rising damp from soil moisture, poor external drainage, and inadequate ventilation.
Rising damp and soil moisture occur when water moves upward through soil via capillary action. Soil naturally contains moisture that migrates toward drier areas, your subfloor being an obvious target. Many Australian homes, especially those built before the 1970s, lack proper damp-proof courses, leaving timber joists directly exposed to hydrostatic pressure. You’ll notice rising damp when moisture appears on floor joists nearest the ground, typically in corners and against external walls.
Poor drainage and stormwater runoff represent the second major cause. When gutters overflow, downpipes discharge too close to the foundation, or ground slopes toward rather than away from your home, water accumulates around the perimeter and finds its way into your subfloor through gaps in the foundation or unsealed access points. Heavy rainfall can dump centimetres of water around your home in hours; if not directed away, it becomes your subfloor’s problem within days.
Inadequate ventilation and air circulation amplify moisture problems significantly. Even when moisture enters through rising damp or drainage issues, proper airflow can dry it out. Blocked passive vents, debris accumulation, and poor subfloor design restrict the air circulation needed to manage humidity. Without sufficient ventilation, moisture lingers, condensation forms, and mould establishes itself. Clearing obstructions and improving airflow often solves 60-70% of the problem.
Signs of Rising Damp in Timber Floors and Subfloors
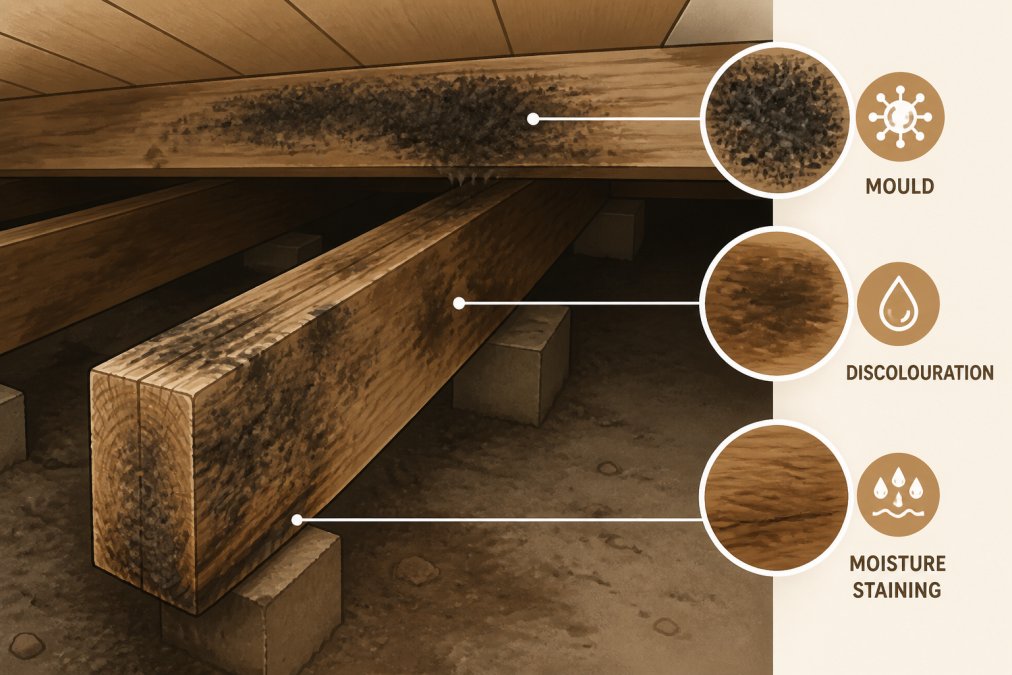
Detecting rising damp early prevents expensive structural repairs.
Musty odours are often the first clue. That distinctive earthy, damp smell comes from mould spores and bacterial growth in moist timber. If your home smells musty even with doors and windows open, the source is almost certainly below the floor.
Visible mould growth on subfloor timber is unmistakable. Mould appears as black, green, or white patches on joists, stumps, and bearer beams. This indicates active moisture problems and poses health risks.
Timber discolouration and softening suggest advanced decay. Affected timber darkens, becomes spongy, and loses structural strength. When you press on affected wood, your finger may leave an impression. This stage requires professional intervention.
Rising damp lines on brick or stumps appear as horizontal staining, typically 30-60 centimetres above ground level, marking the height water has climbed via capillary action.
Peeling paint or wallpaper on interior walls indicates moisture migrating upward through the floor structure when rising damp saturates the subfloor.
Sagging or bouncy floors develop when timber absorbs excessive moisture, swells, then dries unevenly, creating noticeable flex underfoot.
Step 1: Clear Ventilation Blockages and Improve Subfloor Airflow
The fastest way to stop subfloor dampness is often the simplest: improve air circulation by removing obstructions. This costs virtually nothing and can reduce humidity levels within days.
Locating and removing debris is your first task. Access your subfloor through floor vents, access hatches, or by crawling under raised timber homes. You’ll likely find leaves, soil, spider webs, and debris blocking vents. Use a stiff brush, vacuum, or by hand (wearing gloves) to clear blockages. Pay special attention to passive vents around the perimeter. Remove any stored items, old materials, or building waste under the house, as these trap moisture and prevent air circulation.
Checking passive vents for obstructions requires inspection from both inside and outside. From outside, look at each vent opening for soil, mulch, or leaf blockages. From inside the subfloor, check whether the vent opening is clear. Many vents become partially buried as soil settles. Ensure all vents are unobstructed and positioned to allow cross-ventilation. Most homes need one vent per 1-2 metres of perimeter. Clear vents of bird nests, insulation, or accumulated dust using a stiff brush pushed through from outside.
After clearing vents and debris, wait 48-72 hours before assessing results. Improved airflow typically reduces musty odours within three days and visible mould growth within 1-2 weeks if the moisture source isn’t active.
Step 2: Install a Polyethylene Moisture Barrier
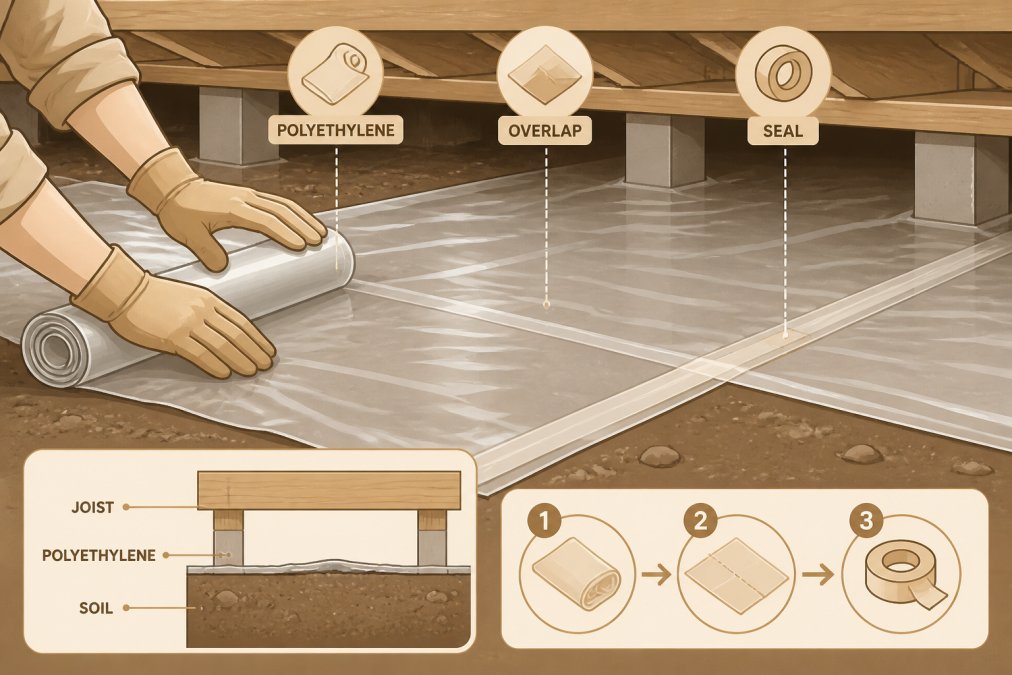
When ventilation improvements alone don’t solve the problem, a polyethylene moisture barrier creates a physical shield between soil moisture and your subfloor. This is one of the most effective methods to stop subfloor dampness permanently.
Measuring and preparing the subfloor comes first. Measure the total subfloor area in square metres. You’ll need polyethylene film thick enough to resist tearing, typically 200 microns (0.2mm) or thicker. Clear the subfloor completely, removing all debris. Rake the soil smooth to remove sharp rocks or sticks that could puncture the film. Fill any low spots where water might pool.
Laying and sealing the vapour barrier requires careful attention to overlaps and sealing. Unroll the polyethylene film across the subfloor, starting from one corner. Overlap each strip by at least 20 centimetres where it meets the next strip. Seal all overlaps with heavy-duty waterproof tape designed for moisture barriers. At the edges, bring the polyethylene film up the foundation wall or stumps by 15-20 centimetres to prevent moisture from flowing around the barrier’s edge. Create small gaps (2-3 centimetres) at the lowest points to allow any water that enters to drain away rather than pool. The installation typically takes 4-6 hours for a standard 100-square-metre subfloor, costing $2-5 per square metre on materials.
Do not seal the barrier completely. Some moisture vapour must escape, or it will accumulate and defeat the barrier’s purpose. Small drainage gaps at low points are essential.
Step 3: Manage External Ground Levels and Drainage
External water management is critical because even the best subfloor ventilation and barriers can’t help if water is actively pooling around your home’s perimeter.
Adjusting ground slope away from the house is fundamental. Ideally, ground should slope downward at a gradient of 5-10% (roughly 5-10 centimetres drop per metre of distance) as it moves away from your foundation. Check the slope by observing where water flows after heavy rain. If toward the house, you need to regrade the soil by removing soil near the foundation, building it up slightly, and creating a gentle slope away. This work is best done in dry conditions and typically takes 1-2 days for a standard house.
Installing or improving external drainage handles water that can’t be managed by slope alone. French drains (perforated pipe buried in gravel) collect water at ground level and direct it away from the foundation. Dig a trench 30-45 centimetres deep around the perimeter, place perforated drainage pipe in the trench, surround it with gravel, and cover with soil. Surface drains (shallow channels or swales) redirect water without digging and are appropriate for areas where excavation isn’t possible. Gutter and downpipe management prevents roof water from accumulating near your foundation. Ensure gutters are clean and sloped to direct water into downpipes. Extend downpipes at least 1.5 metres away from the house foundation. Check that your stormwater drainage system functions correctly and have it professionally cleaned every 2-3 years.
Best Subfloor Fans for Moisture Control and Ventilation
When passive ventilation isn’t sufficient, mechanical ventilation fans actively push air through your subfloor, dramatically improving moisture control.
Mechanical ventilation fans vs passive vents differ fundamentally. Passive vents rely on natural air pressure differences and wind, providing limited control. Mechanical fans actively push air, creating consistent airflow regardless of weather. In humid climates like the Sunshine Coast, mechanical fans often outperform passive vents alone.
Subfloor ventilation fans are typically mounted in a vent opening and connected to a timer or humidity sensor. They draw moist air out of the subfloor and exhaust it outside, replacing it with drier external air. This constant air exchange reduces humidity levels and prevents mould growth.
Subfloor ventilation cost and installation varies based on fan size and features. A basic subfloor fan costs $150-400. Installation involves mounting the fan in a vent opening, running ductwork if needed, and connecting electrical power. Most homeowners can install a simple fan in 2-3 hours. Professional installation typically costs $200-500 in labour, bringing total cost to $350-900 for a single fan. For homes needing 2-3 fans, a well-designed system with ductwork and humidity-sensing controls might cost $1,500-3,000 installed.
Consider fans with humidity sensors that activate automatically when subfloor humidity exceeds a set threshold (typically 60-70% relative humidity). This runs the fan only when needed, reducing electricity costs while maintaining effective moisture control.
For most Australian homes with subfloor dampness, a combination of improved passive ventilation (cleared vents) plus one mechanical fan solves the problem. This hybrid approach costs less than a full mechanical system while delivering superior results to passive ventilation alone.
Health Implications of Subfloor Mould and Moisture
Subfloor mould and moisture pose genuine health risks to household members, particularly those with respiratory sensitivities. Mould spores travel through your home’s air and into living spaces via floor cavities and air gaps. Residents breathe these spores continuously, and for sensitive individuals, this triggers allergic reactions, asthma exacerbations, and respiratory irritation. Children and elderly household members are particularly vulnerable.
Common health effects include persistent coughs, sneezing, nasal congestion, and itchy eyes. Some people experience more severe reactions: shortness of breath, wheezing, or asthma attacks. Immunocompromised individuals face additional risks from certain mould species. Studies on indoor air quality show that homes with damp subfloors have higher mould spore counts in living spaces. Addressing subfloor moisture typically improves indoor air quality within 2-4 weeks, and household members often report noticeable improvements in respiratory symptoms.
Maintenance Schedule to Prevent Subfloor Dampness
Once you’ve addressed subfloor dampness, a simple maintenance routine prevents recurrence.
| Task | Frequency | Duration | Purpose |
|---|---|---|---|
| Clear subfloor vents and debris | Quarterly (4x yearly) | 30-45 minutes | Maintain airflow |
| Check gutters and downpipes | Quarterly | 20-30 minutes | Prevent water pooling |
| Inspect for new mould or musty odours | Monthly | 10-15 minutes | Early detection |
| Check ground slope around house | Annually | 15-20 minutes | Ensure water flows away |
| Test mechanical fan operation | Monthly | 5 minutes | Verify system function |
| Professional subfloor inspection | Every 2 years | 1-2 hours | Comprehensive assessment |
| Clean stormwater drains | Annually or after heavy rain | 1-2 hours | Prevent blockages |
Quarterly vent clearing is non-negotiable. Leaves, soil, and debris accumulate constantly. A 30-minute session each season keeps vents clear and maintains airflow. Monthly visual inspections catch problems early. Look for new mould growth, musty smells, or moisture staining. Annual professional inspections provide expert assessment and identify problems you might miss. Gutter maintenance prevents external water issues that cause subfloor dampness. Clean gutters quarterly, more frequently if you have overhanging trees. This maintenance schedule takes roughly 2-3 hours per year and costs nothing if you do it yourself.
Subfloor dampness is a solvable problem, but it requires understanding your specific situation and addressing it systematically. Whether your issue stems from rising damp, poor drainage, or inadequate ventilation, the methods outlined above address each cause directly. At Solazone Australia, we’ve helped thousands of homeowners across Melbourne and the Sunshine Coast eliminate subfloor dampness using these proven techniques. Our team brings over 40 years of technical expertise to moisture control solutions, and we can assess your specific situation and recommend the most cost-effective approach for your home. Get started with a professional subfloor inspection, and you’ll have a clear plan to protect your home’s structural integrity and your family’s health for years to come.
Frequently Asked Questions
What are the main signs of subfloor dampness in Australian homes?
Common signs include musty odours in rooms above the subfloor, visible mould growth on timber joists, soft or spongy floorboards, and condensation on metal pipes. Rising damp often causes discolouration on timber, and you may notice increased humidity levels inside the home. If structural integrity is compromised, floorboards may feel bouncy or creak more than usual.
How do I improve subfloor airflow without major renovation?
Start by clearing subfloor debris and checking that passive vents are not blocked by soil, leaves, or obstructions. Ensure the ground slope directs water away from the foundation. If passive vents are insufficient, consider installing mechanical ventilation fans designed for subfloor spaces. These draw moist air out and improve air circulation, reducing humidity levels and preventing mould growth over time.
How much does subfloor ventilation cost in Australia?
Costs vary based on subfloor size, the type of ventilation system, and your location. Passive vents are the most affordable option, while mechanical ventilation fans require higher initial investment but provide better moisture control. Installation labour also affects total cost. Contact local installers for quotes tailored to your property, as pricing depends on site access, subfloor height, and the extent of moisture damage requiring remediation.
Can I install a polyethylene moisture barrier myself, or should I hire a professional?
DIY installation is possible for accessible subfloors if you follow proper technique: measure carefully, overlap seams by at least 150 mm, and seal joints with tape. However, if your subfloor is cramped, has high hydrostatic pressure, or existing mould is present, a professional should assess the situation first. Professionals can identify underlying drainage issues and ensure the barrier is installed correctly to prevent future moisture ingress and structural damage.
This article was written using GrandRanker