
Table of Contents
- Understanding subfloor moisture problems
- How solar ventilators work to reduce dampness
- Solar vs electric subfloor fans: Which is right for you
- Sizing your solar ventilation system
- DIY subfloor ventilation installation: Step-by-step
- Preventing mould and mildew through active ventilation
- Long-term maintenance and troubleshooting
- Conclusion
Last Updated: August 19, 2026
Understanding subfloor moisture problems
Subfloor dampness is one of the most common structural issues homeowners face, yet it often goes unnoticed until serious damage occurs. Excess moisture accumulates beneath your home when air circulation is poor, creating an environment where mould thrives and structural timbers deteriorate. Trapped humidity weakens wooden joists, corrodes metal components, and creates musty odours that permeate living spaces above.
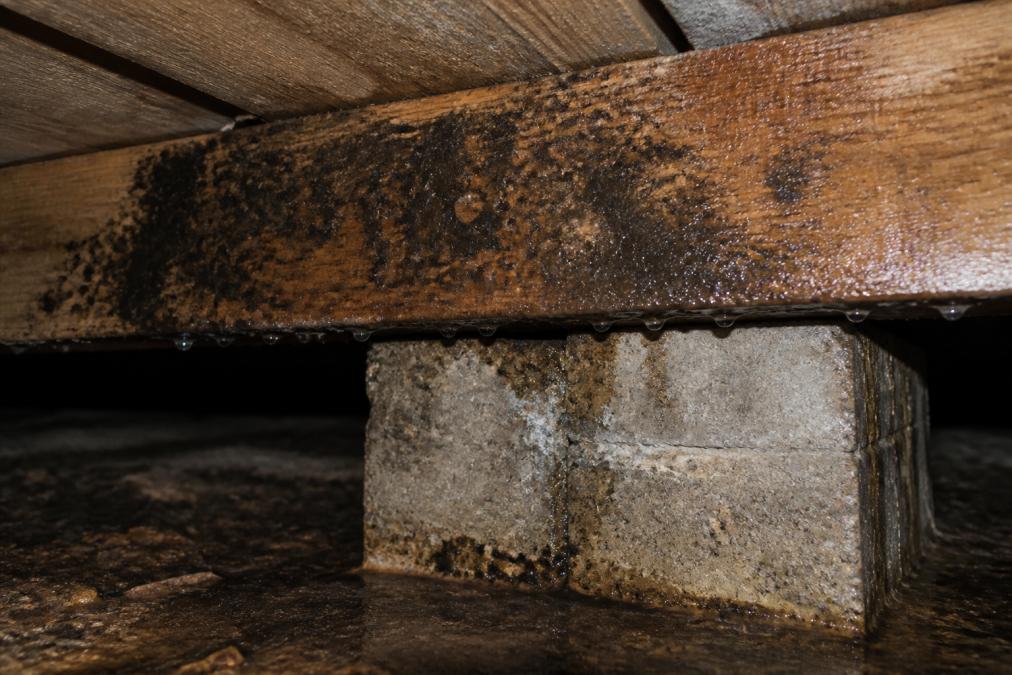
Moisture accumulates due to basic physics: warm air from your home rises and escapes through the roof, drawing cooler outside air into the subfloor. When that air meets cold surfaces, concrete slabs, or exposed earth, condensation forms. Without active airflow to move this moisture out, it settles and concentrates beneath your home.
Soil type and site drainage play a critical role. Clay-heavy soils retain water far longer than sandy soils. Properties in low-lying areas or near water sources experience higher groundwater pressure pushing moisture upward through concrete slabs. Poor guttering or inadequate slope around the perimeter can direct water toward your foundation, increasing moisture load in the subfloor.
The consequences are substantial: mould remediation becomes expensive, structural damage accelerates, timber rot weakens load-bearing joists, and metal corrosion compromises plumbing and electrical systems. The musty smell is often the first sign, but by then moisture has already been accumulating for months or years. This is where solar ventilators for damp subfloors become essential, they remove moisture before it causes damage.
How solar ventilators work to reduce dampness
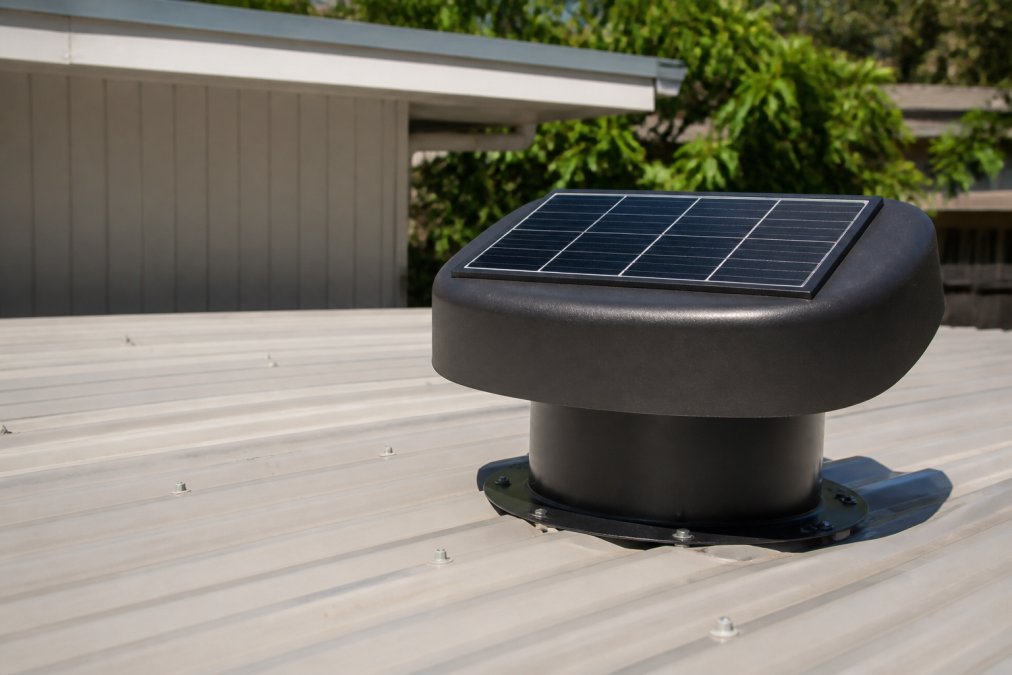
A solar ventilator is a fan powered by a photovoltaic panel that continuously moves air through your subfloor space. Unlike passive vents that rely on natural pressure differences, solar ventilators create forced airflow regardless of weather conditions or temperature. This active air movement is key to controlling moisture and preventing mould.
Solar panels charge a DC motor throughout daylight hours. That motor drives a fan that pulls humid air from the subfloor and pushes it outside through ducting. Fresh air is simultaneously drawn in through intake vents on the opposite side. This continuous exchange replaces stagnant, moisture-laden air with drier outside air, lowering humidity levels and condensation.
Airflow mechanics and humidity control
Effectiveness depends on cubic feet per minute (CFM), the volume of air moved per minute. A solar ventilator with higher CFM rating moves more air faster, critical for controlling humidity in larger subfloor areas. CFM capacity must match your actual subfloor dimensions; oversizing creates unnecessary cost, while undersizing leaves pockets of stagnant air where moisture accumulates.
A properly sized solar ventilator reduces relative humidity from 80-90% (typical in damp subfloors) down to 50-65%, the threshold below which mould cannot thrive. Moving air prevents thermal stratification and ensures moisture is evenly distributed and gradually expelled rather than pooling in corners.
Why moisture accumulates in subfloors
A subfloor is a semi-enclosed environment cooler than the living space above, making it ideal for condensation. Air pressure inside your home naturally pushes downward and outward; without active ventilation pulling air out, that pressure gradient is weak.
Soil moisture adds another layer. Even without standing water, soil contains moisture that gradually evaporates upward through concrete slabs into the subfloor space. A concrete slab with no damp-proof membrane acts like a wick, drawing moisture from the earth beneath. Warm air from inside meets the cold subfloor surface and condenses, accumulating on timber, metal, and concrete surfaces, the perfect breeding ground for mould.
Solar vs electric subfloor fans: Which is right for you
Both solar and AC-powered ventilation systems can control subfloor dampness, but they differ significantly in operating costs, performance consistency, and installation complexity.
A solar ventilator operates only during daylight hours when the photovoltaic panel receives sufficient sunlight. On overcast days or during winter months, airflow may be reduced. If your subfloor moisture problem is severe or your site has poor drainage, a solar system alone may not provide enough total air exchange over a 24-hour period.
An AC-powered fan runs continuously regardless of weather or time of day, providing more reliable humidity control in challenging conditions. However, AC fans require mains power installation and consume electricity continuously, adding to energy bills.
Operating costs and energy efficiency
Solar ventilators shine financially. A solar unit has no operating cost once installed; the sun provides free energy indefinitely. Over a 10-year period, savings compound significantly compared to running an AC fan.
An AC fan drawing 40-60 watts continuously costs roughly 20-30 AUD annually in electricity, totalling 200-300 AUD over a decade. However, solar systems typically cost more upfront due to the photovoltaic panel. Your payback period depends on how long you plan to stay in the property.
Performance in low-light conditions
Solar ventilators perform poorly on overcast days or in winter, delivering only 30-50% of rated CFM capacity on cloudy days. For mild dampness in well-drained areas, this may be acceptable. For severe moisture problems, it’s insufficient. AC fans eliminate this variability, delivering consistent airflow regardless of weather.
Some hybrid approaches combine a solar fan with battery backup or a small AC fan that activates on low-light days, providing the best of both worlds at added complexity and cost.
Sizing your solar ventilation system
Undersizing a solar ventilator is the most common mistake homeowners make. Proper sizing requires calculating your subfloor volume and accounting for site-specific factors like soil type and drainage.
Calculating CFM requirements for your subfloor area
Measure your subfloor dimensions: length, width, and average height. Multiply these to get total cubic volume.
Achieve at least 6-8 complete air exchanges per hour. For a 100 cubic metre subfloor, this requires a CFM rating of at least 600-800 CFM. Account for ducting losses by sizing up 20-30%; a 150 cubic metre subfloor needs a solar ventilator rated 750+ CFM.
Accounting for soil type and site drainage
Clay soils retain water and release it slowly into the air above. Sandy soils drain quickly but allow more groundwater to reach your foundation if drainage is poor. Properties with clay soils in low-lying areas need more aggressive ventilation; size your solar ventilator toward the upper end of the CFM range. preventing condensation issues.
If water pools around your perimeter after rain, or if your property is near a creek or has a high water table, moisture pressure is higher. Size up your solar ventilator accordingly. The cost difference between units is modest, but performance difference in challenging conditions is substantial.
DIY subfloor ventilation installation: Step-by-step
Installing a solar ventilator is achievable for homeowners with basic DIY skills. The process typically takes a weekend and requires only common tools.
What you’ll need before starting
Gather these materials: solar ventilator unit (sized to your CFM requirements), flexible ducting (100-150mm diameter), duct clamps and foil-backed tape, vent covers, mounting hardware, saw or jigsaw, drill, tape measure, ladder, work gloves, and dust mask.
Before purchasing, verify your solar ventilator’s specifications: outlet diameter, CFM rating, solar panel size, and recommended duct length limits.
Placement and vent positioning
Vent placement determines whether your solar ventilator actually solves your moisture problem or creates dead zones. Position intake vents and exhaust vents on opposite sides of the subfloor to create cross-ventilation. Avoid placing both vents on the same side; air will simply recirculate without adequately ventilating the entire space.
Intake vents should be positioned low (within 300mm of the ground) to draw in fresh air. Exhaust vents can be higher, ideally at least 1 metre above ground to discharge air away from your home’s perimeter.
Mount the solar panel on a roof surface that receives direct sunlight for most of the day. Avoid mounting under trees or near structures that cast shadows, as even partial shading reduces solar panel output significantly.
Securing the unit and testing airflow
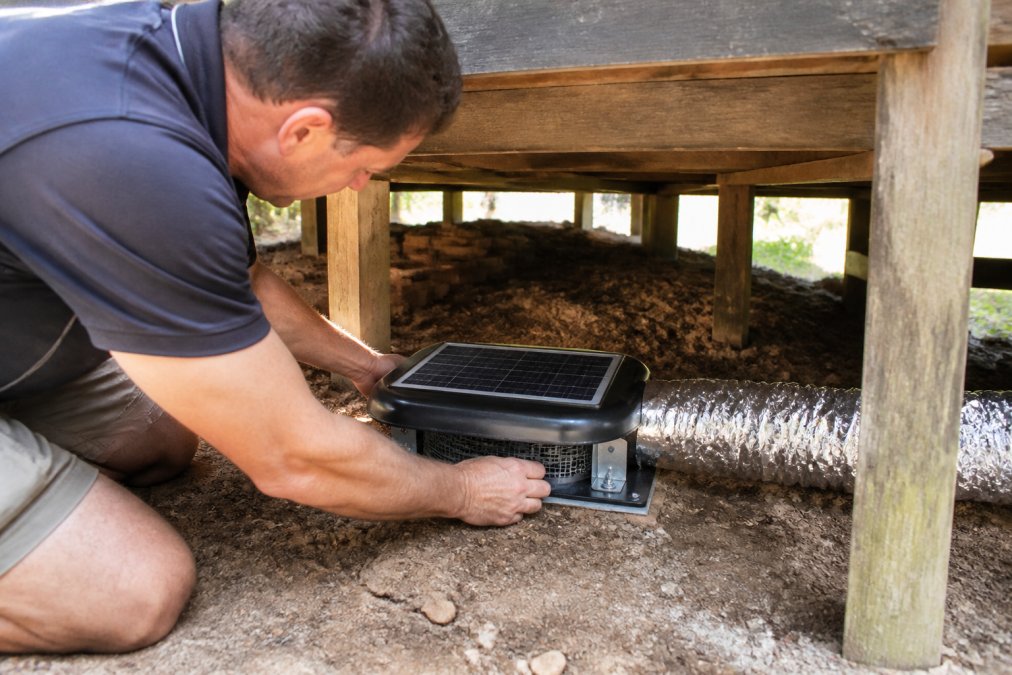
Secure the unit firmly using the mounting brackets provided. Connect ducting from the unit’s outlet to your exhaust vent, using duct clamps every 300-400mm and sealing joints with foil tape.
Test the system on a sunny day. You should feel air movement at intake vents and warm air exiting the exhaust vent. If airflow feels weak, check for blockages in ducting and verify the solar panel isn’t shaded. Monitor humidity levels over the following weeks using a digital hygrometer. Humidity should gradually decrease from 80-90% toward 50-65%.
Preventing mould and mildew through active ventilation
Mould cannot establish itself without sustained high humidity. By controlling moisture through active ventilation, you eliminate the conditions mould needs to grow.
Mould spores are everywhere. They remain dormant until humidity exceeds 65% and they find a suitable surface. Once conditions are right, they germinate and spread rapidly. Within weeks, a damp subfloor can develop visible mould colonies that release spores into your living space above.
Active ventilation prevents this by maintaining humidity below the mould growth threshold. A solar ventilator continuously removes moisture-laden air and replaces it with drier outside air. The mildew odour that develops in damp subfloors is a chemical byproduct of mould metabolism. Eliminating the moisture eliminates both the mould and the smell. Homeowners often notice musty odours disappearing within 2-4 weeks of installing a solar ventilator.
For existing mould, ventilation alone may not be sufficient. Visible colonies should be cleaned with appropriate fungicides before or during ventilation installation. However, ventilation prevents mould from returning.
Long-term maintenance and troubleshooting
A solar ventilator requires minimal maintenance, but a few simple checks ensure it continues operating effectively for years.
Monitoring humidity levels and condensation
Check your subfloor humidity monthly using a digital hygrometer. Healthy levels are 50-65% relative humidity. If humidity creeps above 70%, investigate why. Common causes include duct blockages, reduced solar panel output due to accumulated dirt, or inadequate CFM capacity.
Condensation on cold surfaces should largely disappear once ventilation is active. If condensation persists in specific areas, it may indicate poor airflow to that zone.
Common issues and solutions
Weak airflow despite sunny conditions: Clean the solar panel gently with a soft cloth and water. Inspect ducting for kinks, blockages, or disconnected sections. Verify all duct clamps are tight.
Unit runs but humidity remains high: You likely undersized the solar ventilator. Calculate your actual CFM requirement and compare it to your unit’s rating. If undersized, install a second unit or upgrade to a higher-capacity model.
Noisy operation: Vibration usually indicates loose mounting hardware. Tighten all brackets and fasteners.
Visible mould despite ventilation: Ensure humidity is actually below 65%. If it is, mould may be residual from before installation. Clean affected areas with fungicide.
Solar panel not charging during winter: Reduced daylight and lower sun angles naturally reduce solar output. If your subfloor moisture problem is severe, consider adding a small AC fan that activates on low-light days.
Proper sizing, careful vent placement, and regular monitoring are the three factors that determine success. A solar ventilator is a set-and-forget solution when installed correctly.
Subfloor dampness doesn’t resolve itself, and ignoring it creates expensive structural damage that compounds over time. A solar ventilator addresses the root cause, moisture accumulation, rather than treating symptoms. With over 40 years of technical expertise, Solazone Australia helps homeowners and businesses select and install ventilation systems tailored to their specific site conditions, soil type, and subfloor dimensions. Our Australian-made equipment and experienced installation teams ensure your system delivers the airflow capacity needed to keep humidity below the mould threshold. Get started with Solazone Australia and reclaim a dry, healthy subfloor space.
Frequently Asked Questions
How do solar ventilators reduce subfloor moisture?
Solar ventilators create continuous airflow through the subfloor cavity, drawing moist air out and replacing it with drier air. This active air exchange lowers humidity levels and prevents condensation from accumulating on timber and concrete. By maintaining lower moisture content in the subfloor space, solar ventilators reduce conditions that encourage mould growth and structural damage. The system runs passively during daylight hours, requiring no mains power.
What are the main differences between solar and electric subfloor fans?
Solar fans operate only during daylight and produce no electricity costs, though their CFM capacity may be lower in shaded areas or winter months. Electric fans run 24/7 regardless of weather or time of day, delivering consistent airflow but adding to your power bill. Solar systems are ideal for off-grid applications and homes seeking energy independence, while electric fans suit situations where continuous ventilation is critical or roof access is limited. Long-term cost savings favour solar, but electric fans offer more reliable, predictable performance.
Can I install a solar subfloor ventilator myself?
Yes, DIY installation is possible for most homeowners with basic tools and access to your subfloor space. You'll need to locate suitable vent openings, ensure proper positioning for airflow, and secure the unit firmly to prevent vibration. However, sizing the system correctly for your subfloor area and soil type requires careful calculation of CFM requirements. If your subfloor has structural damage, poor drainage, or complex layout, professional assessment is recommended to avoid costly mistakes.
What signs indicate your subfloor needs ventilation?
Look for musty odours rising through floorboards, visible mould or mildew on subfloor surfaces, soft or rotting timber, rust on metal components, or condensation on pipes. Increased humidity indoors, particularly in bedrooms and living areas, often points to subfloor dampness. If you notice the home feels damp even on dry days, or if you've had previous water ingress or flooding, subfloor ventilation can prevent further moisture accumulation and structural deterioration.
This article was written using GrandRanker