
Table of Contents
- Why Verifying Solar Installation Quality Matters
- Confirm the Installer’s Accreditation and Credentials
- Inspect the Panels, Frames and Mounting Visually
- Check Wiring, Connectors and Electrical Test Results
- How to Check Solar Panel Performance Against a Baseline
- Reviewing Handover Documents and Commissioning Records
- Solar Safety Inspection: What You Can Check and When to Call a Licensed Electrician
- Booking Your Post-Installation Check With Solazone Australia
- Frequently Asked Questions
Why Verifying Solar Installation Quality Matters
Last Updated: October 30, 2026
Solar panels are a big purchase, and most of their value depends on how well they were installed.
Our team at Solazone Australia has spent more than 40 years working on solar systems across Australia. They are installation details that were rushed or skipped. Clean Energy Council accreditation and installer standards
Verification has two parts: checking the paperwork and checking the work itself. Paperwork tells you who installed the system and what was installed. The physical check tells you whether it was installed properly.
Why it matters:
- Poor wiring can cause faults, heat and lost output
- Weak roof fixings can cause leaks or storm damage
- Missing documents can make warranty claims hard to win
- Early checks are cheaper than repairs later
Watch out: Do not assume a system is fine because it switches on. A system can run without a fault and still be wired or mounted poorly.
Confirm the Installer’s Accreditation and Credentials
Start with the installer, not the panels. A qualified installer is the first line of quality control.
Ask for these before the system goes in and check them again at handover:
- The installer’s licence or accreditation number
- Proof the installer holds current electrical credentials
- The name of the licensed electrician who did the wiring
- A written quote that lists every component by make and model
Check the accreditation number with the relevant state or territory authority, as licensing rules vary between states.
If an installer will not provide these details, consider looking elsewhere.
Inspect the Panels, Frames and Mounting Visually
A visual check takes about 30 minutes and needs no special tools. Use a torch in daylight and stand on the ground or a secure ladder. Do not climb onto a roof.
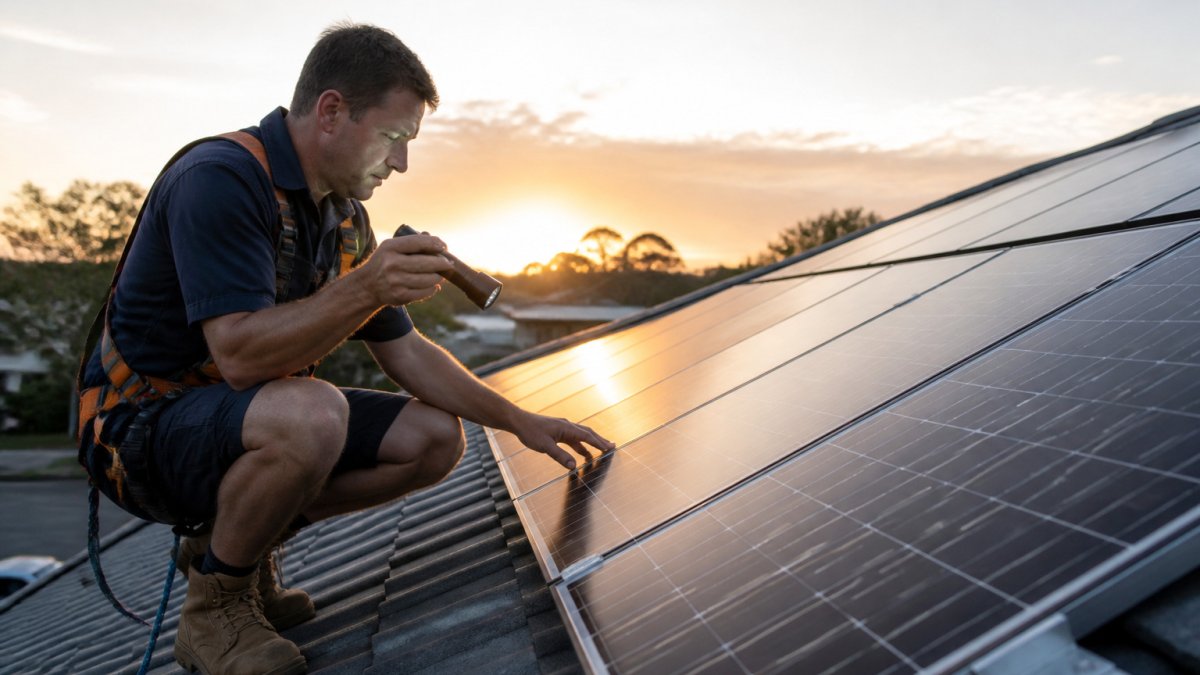
!A homeowner in work clothes standing on a residential pitched roof, carefully inspecting a row of solar panels with a torch in the late afternoon light
Look for these signs:
- Cracks, chips or scratches on the glass surface
- Cells with uneven colour or visible lines
- Frames that are bent, twisted or not level
- Panels that sit at different heights in the same row
- Dirt, leaves or bird droppings that block light
Small cosmetic marks are common and rarely affect output. Cracked glass, delamination (layers separating) and bubbling should be reported to the installer straight away.
Roof Penetrations, Flashing and Cable Routing
The most common installation faults are hidden under the panels. Check these areas where you can see them safely:
- Each roof penetration should have proper flashing sealed around it
- Mounting rails should be fixed to rafters, not just the roof sheeting
- Cables should be secured and protected from sun and wind, not left hanging
- Mounting hardware should look matched and free of rust
If you see gaps, loose fixings or cables resting on sharp edges, note them and ask the installer to inspect.
Check Wiring, Connectors and Electrical Test Results
Electrical work should always be checked by a licensed professional. Homeowners can still ask the right questions, read the commissioning report and spot the warning signs that a system was not tested properly.
What the commissioning report should contain
Ask your installer for the full commissioning report, not just a summary. A complete report for a typical residential system should include:
- String open-circuit voltage (Voc) and short-circuit current (Isc) for each string
- Insulation resistance test results for the DC array
- Polarity and continuity checks on all strings
- Inverter start-up and grid-protection test results
- The date, the name of the licensed electrician and their licence number
If any of these are missing, ask why. A report that lists only “system tested and working” is not a commissioning report.
Reading the numbers without guessing
You do not need to interpret the readings yourself, but you can check that they are internally consistent:
- String voltages should be similar across strings of the same length and panel model. A large difference points to a wiring or connector fault.
- Insulation resistance readings should be high and stable. A low or fluctuating reading can indicate moisture ingress, damaged cable or a poor connector.
- The measured array size and configuration should match the as-built drawings and the quote.
If a reading looks odd, ask the installer to explain it in writing. A qualified installer can explain why a value is normal for your roof, orientation and panel model. If they cannot, get a second opinion from an independent licensed electrician before you accept handover.
Connectors and junction boxes
Connectors are one of the most common failure points on residential systems. Ask the installer to confirm:
- That connectors are the same brand and model on both the panel and the cable side
- That they were crimped with the correct tool, not with pliers
- That junction boxes are sealed, labelled and mounted clear of standing water
- That no connectors are resting on the roof surface or exposed to direct sun where they can degrade
Never open junction boxes, inverter casings or DC isolators yourself. Solar arrays can carry high DC voltage whenever there is light, even on overcast days. Visual checks from the ground are safe; anything involving covers, terminals or testing is a job for a licensed electrician.
Wiring diagram and switchboard
Ask for a wiring diagram that shows how the array connects to the inverter, the isolators and the switchboard. Check that the diagram matches what you can see from the ground and that the switchboard has a clearly labelled solar circuit.
For guidance on common faults, our troubleshooting guide for solar system issues explains the signs of a wiring or connector problem and when to call a professional.
The article lists the key commissioning values and the signs that point to a wiring or connector problem, summarised below.
| Check | What to look for | Warning sign |
|---|---|---|
| String voltage (Voc) | Similar across strings of the same length and model | Large difference between strings |
| Insulation resistance | High and stable readings | Low or fluctuating readings |
| Array size | Matches as-built drawings and quote | Configuration differs from drawings |
| Connectors | Same brand and model on both sides, correctly crimped | Pliers used, mixed brands |
| Junction boxes | Sealed, labelled, clear of standing water | Unsealed or unlabelled boxes |
| Switchboard circuit | Clearly labelled solar circuit | Unlabelled or missing circuit |
How to Check Solar Panel Performance Against a Baseline
A baseline is your system’s expected output on a clear day. Most homeowners never set one, which makes it hard to tell a normal cloudy week from a genuine fault. The method below gives you a like-for-like comparison instead of a single number.
Step 1: Set a realistic baseline in the first month
In the first two to four weeks after installation, record the daily output from your monitoring app on clear, sunny days. Note the date, the weather and the time of peak production. Use the best three or four clear days to set a baseline range, not a single figure. A range accounts for small day-to-day variation in temperature and haze.
Step 2: Compare like with like
Output changes with season, cloud cover, temperature and shading. When you compare, match these conditions:
- Compare clear days with clear days, not with cloudy ones
- Compare the same month or season where possible
- Note the time of year, because winter days are shorter and the sun is lower
- Check for new shading from trees, chimneys or nearby buildings
A common pattern is a small drop in output after rain or heavy cloud, which usually clears on the next sunny day. A sustained drop over several clear days is worth investigating.
Step 3: Separate normal variation from a fault
Use this simple test:
- A drop of a few per cent on a cloudy day is normal
- A drop that recovers on the next clear day is usually weather-related
- A drop that persists across several clear days, or affects one string more than others, points to a fault
- A sudden drop to zero, or repeated inverter fault codes, needs a licensed electrician
Panels also lose a small amount of output each year. Realistic expected degradation figures are covered in our guide to solar panel degradation rates.
Step 4: Check the easy causes first
Before calling anyone, check the safe, visible causes:
- Dirt, leaves or bird droppings on the panels
- New shading from a tree or building
- A tripped breaker or a fault code on the inverter display
- Monitoring data that has stopped updating
If output stays well below your baseline after these checks, contact the installer with your records. A dated log of daily output is far more useful to a service technician than a general complaint that the system “seems low”.
Keep a simple log in a notes app or spreadsheet: date, weather, daily output and any fault codes. Two minutes a day gives you the evidence you need for a warranty or service call.
Reviewing Handover Documents and Commissioning Records
Handover is the moment the system passes from the installer to you. Do not accept it without the right paperwork.
Ask for these documents:
- The commissioning report with all test results
- Product labels and certificates for panels, inverter and battery
- Warranty documents for the panels, inverter and workmanship
- As-built drawings showing the final layout
- Photos of the installation, including the roof and switchboard
- Contact details for warranty claims and service
Keep these documents in one folder, digital and printed. You will need them for insurance, resale and any future warranty claim.
Solar Safety Inspection: What You Can Check and When to Call a Licensed Electrician
Some checks are safe for homeowners. Others must be left to a licensed electrician.
You can safely check:
- Visible panel condition from the ground
- Whether the inverter display shows any fault codes
- Whether monitoring data matches your expected output
- Whether cables and conduit look damaged from below
Call a licensed electrician for:
- Any exposed or damaged wiring
- Burning smells, scorch marks or hot connectors
- Tripped breakers or repeated inverter faults
- Any work inside the switchboard or on the roof
Never open junction boxes or inverter casings yourself. Solar systems can carry high DC voltage even when the sun is low.
Our solar safety inspection checklist covers the same points in more detail.
Booking Your Post-Installation Check With Solazone Australia
A post-installation check is the fastest way to confirm your system was installed correctly. It covers the visual, electrical and performance checks in this guide.
If you are unsure about your system, contact Solazone Australia. For current prices and available service options, visit our website or request a quote. Readers on the Sunshine Coast can explore sustainable energy solutions and local service options before booking.
Frequently Asked Questions
How can I check whether my solar panels have been installed correctly?
Start with a visual check: panels should sit level and square in their frames, with no cracks, chips or visible delamination, and mounting rails should be secure with flashing sealed around every roof penetration. Next, ask the installer for the commissioning record showing electrical test results such as string voltage and insulation readings. Compare the figures against the product specifications. If anything looks unclear or the installer cannot show the records, have a licensed electrician inspect the system before you sign off on the job.
What should I inspect before signing off on a solar installation?
Before signing off, check that the solar installation inspection checklist is complete: panel condition, mounting and roof sealing, cable routing and labelling, inverter operation, and the system monitoring set up. Confirm the installer has provided the handover documents, including the system design, certificates, warranty details and the monitoring login. Make sure you understand how to read the inverter display. Sign only once every item is covered and any defects are recorded in writing with a timeline for repair.
What documents should I receive after solar panels are installed?
Expect a set of solar system handover documents that includes the installation certificate, the system design and single line diagram, the product warranty and manufacturer documentation, and the commissioning test results. You should also receive the inverter and monitoring details, and a record of the approval or connection application made to your electricity distributor. Keep these records together, as they are needed for warranty claims, insurance and any future repairs or resale.
Who can inspect a solar installation if I am concerned about its quality?
If you have concerns, a licensed electrician can test the system, inspect the wiring and check the protection devices, and a qualified solar installer can review the workmanship and design. Ask the original installer first to address the issue under the warranty, and keep written records of every request. If the problem is not resolved, you can raise it with the relevant state or territory consumer protection agency or the body that oversees electrical licensing in your state.
