
Table of Contents
- What You’ll Need Before You Start
- Solar Panel Mounting Systems for Tile Roofs
- Step-by-Step: Removing and Replacing Tiles for Mounting Brackets
- AS/NZS 5033 Solar Installation Standards Explained
- Waterproofing and Flashing Requirements
- Why You Need a CEC-Accredited Solar Installer
- Cost of Solar Installation on a Tile Roof
- Common Mistakes to Avoid
- Frequently Asked Questions
Last Updated: September 10, 2026
What You’ll Need Before You Start
Installing solar panels on a tile roof in Australia demands specific tools, safety equipment, and a clear understanding of your roof’s structure before any work begins, and every solar panels tile roof job starts with the same preparation. At Solazone Australia, we’ve spent over 40 years working with tile roofs across diverse conditions, and the preparation stage separates a system that lasts decades from one that causes problems within months.
Before you touch a single tile, gather these essentials:
- Safety gear: fall protection harness, anchor points, non-slip footwear, gloves, and eye protection
- Tile-specific tools: angle grinder with diamond blade, tile hooks or mounting brackets, rail system components
- Sealing materials: flashing, waterproofing membrane, silicone sealant rated for outdoor use
- Structural knowledge: rafter positions, roof pitch, and tile type identification
The biggest mistake we see is homeowners underestimating how different terracotta and concrete tiles behave under pressure. Terracotta cracks if you look at it wrong. Concrete tolerates more handling but weighs significantly more, which affects your structural load calculations.
Never walk on tiles without identifying the underlying batten positions first. Stepping between battens causes immediate tile fracture, and replacing broken tiles mid-installation adds unexpected costs and delays.
Solar Panel Mounting Systems for Tile Roofs
Solar panel mounting systems for tile roofs fall into two categories: tile hooks and rail systems. Each approach suits different roof types and installation scenarios.
Tile Hooks vs Rail Systems
Tile hooks are individual brackets that replace or sit under existing tiles, attaching directly to rafters. They work well for smaller arrays and roofs where minimising tile displacement matters. The downside? Each hook requires precise placement, and mistakes mean broken tiles.
Rail systems use long aluminium rails mounted on brackets, distributing weight across multiple attachment points. This approach handles larger solar arrays better and simplifies panel alignment. For roofs with complex geometry or significant structural load considerations, rails offer more flexibility.
| Feature | Tile Hooks | Rail Systems |
|---|---|---|
| Best for | Small arrays, simple roofs | Large arrays, complex layouts |
| Installation speed | Slower per attachment | Faster overall |
| Tile displacement | Minimal | Moderate |
| Load distribution | Point loads | Spread across rails |
| Adjustment flexibility | Limited | High |
Terracotta vs Concrete Tile Mounting
Terracotta tiles require gentler handling and more precise tile grinding to accommodate mounting brackets. These tiles are brittle and unforgiving. Concrete tiles, while heavier, tolerate more manipulation during installation but demand stronger rafter attachment because of their weight.
The clamping mechanism differs too. Terracotta often needs customised tile hooks that match the tile profile exactly. Concrete tiles work with standard brackets in most cases.
Step-by-Step: Removing and Replacing Tiles for Mounting Brackets
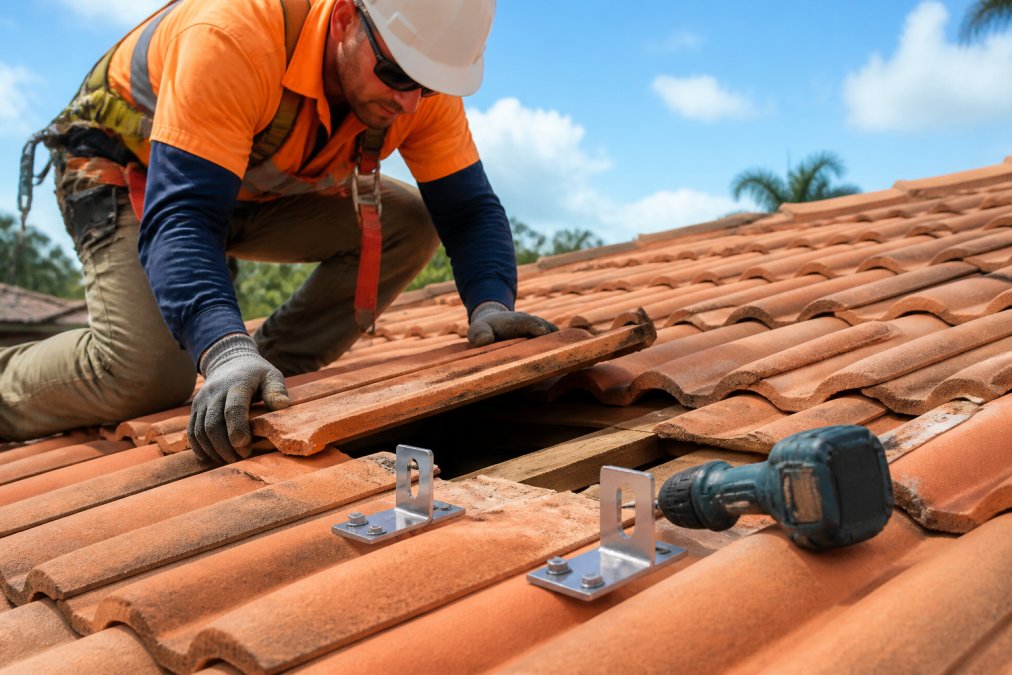
This process requires patience and precision. Rushing leads to tile breakage, compromised waterproofing, and potential roof integrity issues. The technique also changes depending on whether you’re working with terracotta, concrete, or slate tiles, a distinction most guides gloss over.
Step 1: Locate and Mark Rafter Positions
Find your rafters by tapping the roof or using a stud finder designed for tile applications. Mark each position with chalk. Rafter attachment points determine where every mounting bracket goes, so accuracy here prevents problems later.
Rafter spacing in Australian homes is typically 450 mm, 600 mm, or 900 mm centres, and batten spacing is usually 300-350 mm (abcb.gov.au). Knowing both matters: rafters carry the structural load, battens only hold tiles. A common mistake is fixing brackets to battens instead of rafters, which fails under wind uplift.
Step 2: Grind Tiles and Fit Mounting Brackets
Lift the tile carefully. If it won’t lift without cracking, grind a small channel in the tile’s underside to create clearance for the bracket. Fit the mounting bracket to the rafter using appropriate fixings, then apply flashing and sealant around the penetration.
The technique differs by tile type:
- Terracotta: Brittle and unforgiving. Use a diamond blade with light pressure, and consider a tile hook shaped to the specific tile profile. Grinding too aggressively causes hairline cracks that only show after thermal cycling.
- Concrete: Heavier but more tolerant. Standard brackets often fit, but the extra weight means rafter fixings must be rated for the load, typically M8 or M10 stainless steel coach screws into the rafter, not batten.
- Slate: The most fragile. Slate tiles split along natural cleavage planes, so installers usually avoid grinding altogether and instead use slate-specific hooks that slide under the tile without lifting it.
Step 3: Attach Rails and Clamp Panels
Once brackets are secure, attach mounting rails and verify they’re level. Clamp solar panels to the rails using the manufacturer’s specified clamping mechanism. Check panel orientation matches your planned solar array layout.
Step 4: Replace Tiles and Verify Waterproofing
After the brackets and rails are in place, the original tiles (or replacement tiles) are seated back over the flashing. This is where most leaks originate. The tile should sit flush without rocking, and the flashing should extend upslope under the tile above and downslope over the tile below, so water always flows over the penetration, never into it.
Post-Installation Verification Checklist
This checklist is what you should verify before the installer leaves site:
- Tile seating: Walk the roof line (from a safe distance) and check no tiles are rocking, cracked, or sitting proud of their neighbours.
- Flashing coverage: Confirm flashing extends under the upslope tile and over the downslope tile at every penetration.
- Sealant condition: Sealant should be tooled smooth, not smeared, and should be a neutral-cure silicone or polyurethane rated for exterior use.
- Rail alignment: Rails should be parallel and level; misalignment stresses panel frames over time.
- Conduit routing: Conduit should be UV-rated and secured at intervals, not resting on tiles where it can abrade them.
- Earthing: Confirm the array is earthed per AS/NZS 5033 requirements.
- Documentation: Ask for the Certificate of Electrical Safety and the installer’s CEC accreditation number.
Apply sealant to bracket penetrations before replacing tiles, not after. Reaching back under a seated tile to seal properly is nearly impossible, and missed spots become leak points during the first heavy rain.
::: clay tile properties.
If you find cracked tiles after the installer has left, document them with dated photos immediately. Most installers will return to replace tiles broken during installation, but only if the damage is reported promptly and clearly attributable to the install.
AS/NZS 5033 Solar Installation Standards Explained
AS/NZS 5033 is the Australian and New Zealand standard governing photovoltaic array installation requirements. It covers mounting hardware specifications, electrical conduit routing, weatherproofing, and safety requirements for roof-mounted solar systems.
Compliance isn’t optional. Clean Energy Council installation guidelines outline how accredited installers must follow this standard, and non-compliant installations can void warranties and fail inspection.
Key requirements include:
- Mounting hardware rated for local wind loads
- Electrical conduit protected from UV degradation
- Penetration sealing meeting waterproofing standards
- Proper earthing and isolation points
Waterproofing and Flashing Requirements
Every roof penetration creates a potential leak point. Flashing and waterproofing aren’t afterthoughts; they’re the difference between a solar system that performs for 25 years and one that causes ceiling stains within the first wet season.
Proper flashing involves layering materials so water flows over and around penetrations, never pooling near them. Penetration sealing compounds must remain flexible through temperature swings. Weatherproofing failures typically appear at bracket attachment points where sealant has cracked or flashing was installed incorrectly.
Australian Building Codes Board provides guidance on waterproofing requirements for roof penetrations that apply to solar installations.
Why You Need a CEC-Accredited Solar Installer
A CEC-accredited solar installer has completed training and assessment through the Clean Energy Council, demonstrating competency in design, installation, and safety requirements specific to Australian conditions.
Using an accredited installer matters for three reasons:
- Government rebates: Most solar rebate schemes require installation by accredited professionals
- Warranty validity: Manufacturers may void warranties if installation doesn’t meet standards
- Safety compliance: Electrical work must be performed by licensed electricians
Solazone Australia has trained more than 200 staff and maintains accreditation across our installation teams. Our experience with tile roofs means we’ve encountered and solved structural quirks, unusual tile profiles, and access challenges.
The cheapest quote often excludes proper flashing, uses lower-grade mounting hardware, or skips structural assessment. Those savings can disappear when you’re paying for leak repairs or premature system replacement.
Cost of Solar Installation on a Tile Roof
Cost of solar panels tile roof projects varies based on several factors that make tile roofs more complex than metal roofs. Understanding why tile roofs cost more, and what a fair quote should itemise, is the difference between comparing apples to apples and being surprised by a mid-install variation.
Why Tile Roofs Carry a Labour Premium
Tile roofs typically add labour cost over metal roofs for three structural reasons:
- Tile handling and breakage risk. Every bracket requires lifting or grinding a tile, and breakage rates on older terracotta can be significant. Installers build a contingency into their labour estimate for replacement tiles and extra time.
- Slower attachment process. A metal roof bracket can often be fixed in minutes. A tile roof bracket involves locating the rafter, lifting the tile, grinding if needed, fixing the bracket, flashing, sealing, and reseating the tile, often three to four times longer per attachment.
- Waterproofing complexity. Tile roofs rely on overlapping tiles and gravity, not a continuous membrane. Every penetration must be flashed to restore that overlap, which is skilled work.
What Drives Your Quote Up or Down
- Roof complexity: Steep pitch, multiple levels, valleys, and intricate layouts increase labour time.
- Tile type: Terracotta and slate require more careful handling than concrete, and slate in particular may need specialist hooks.
- Roof age and condition: Older homes may need rafter reinforcement, and brittle tiles may need replacing during install.
- Access difficulty: Two-storey homes, obstructed roof areas, and limited ground access for scaffolding add cost.
- System size: Larger solar arrays require more mounting hardware and rails, but the per-panel labour cost often drops because setup is amortised.
- State-based incentives: Rebate availability and feed-in tariff rates vary by state and territory, which affects your net outlay more than the gross install price.
What a Fair Quote Should Itemise
Ask for a quote that breaks out the following. If an installer won’t itemise, that’s a warning sign:
- Mounting hardware (tile hooks or rails, and their wind-load rating)
- Flashing and sealing materials
- Labour, including any tile-replacement allowance
- Structural assessment fee (if applicable)
- Electrical work and Certificate of Electrical Safety
- Scaffolding or height-access costs
- Removal and disposal of any broken tiles
Comparing Tile vs Metal Roof Quotes
When comparing quotes across roof types, don’t compare the headline number alone. A tile roof quote that includes a tile-replacement allowance and proper flashing may look higher than a metal roof quote that doesn’t need either, but the metal roof quote isn’t doing the same work. Compare like for like: same system size, same inverter, same mounting standard, same warranty terms.
Pricing depends on your specific situation. Request a detailed quote that itemises mounting hardware, flashing materials, labour, and any structural assessment fees. For current pricing tailored to your property, Solazone Australia provides obligation-free quotes.
If a quote is significantly below others, check what’s missing, usually flashing quality, tile-replacement allowance, or structural assessment. Those omissions can become your cost later.
Common Mistakes to Avoid
The most expensive mistakes happen before installation begins. Here’s what we see repeatedly:
Skipping structural assessment. Not every roof can handle the additional weight of a solar array without reinforcement. A structural load assessment identifies problems before they become expensive.
Using incorrect mounting hardware. Brackets designed for metal roofs fail on tiles. Tile hooks must match your tile profile.
Ignoring roof pitch. Solar panel orientation affects output. Steep roofs may need different mounting angles to optimise generation.
Poor penetration sealing. Every bracket creates a hole. Inadequate waterproofing leads to leaks that may not appear for months.
Choosing installers on price alone. Unaccredited installers cut corners on flashing, hardware quality, and compliance. The savings rarely justify the risk.
Forgetting roof maintenance access. Your solar array shouldn’t block access to gutters, valleys, or other maintenance areas.
Tile roof solar installation rewards careful preparation and punishes shortcuts. The complexity of tile breakage risk, waterproofing requirements, and structural considerations means this isn’t a project for generalist installers. Solazone Australia brings over 40 years of technical expertise to every installation, with experienced teams who understand terracotta and concrete tile systems, maintain CEC accreditation, and provide personalised service from assessment through to post-installation support. Get started with Solazone Australia and secure a solar system built for your roof’s specific requirements.
Frequently Asked Questions
Is it harder to install solar panels on a tile roof?
Yes, it takes longer than a metal roof because each tile must be lifted, ground or replaced to reach the rafters. Terracotta and concrete tiles are brittle, so installers use tile hooks and flashing to avoid cracking. A tile roof installation typically adds labour time, which affects the overall cost of solar installation on a tile roof.
What mounting systems are best for terracotta or concrete tiles?
For terracotta, stainless steel tile hooks with adjustable height work best because they let installers match the tile profile without grinding too much. Concrete tiles suit similar hooks or rail systems. Both need flashing and waterproofing around every penetration. Solar panel mounting systems for tile roofs must be corrosion-resistant to handle coastal and inland weather.
Do I need a CEC-accredited installer for my solar system?
Yes. A CEC-accredited solar installer has passed the Clean Energy Council’s assessment and can sign off on compliance with AS/NZS 5033 solar installation standards. Without accreditation, your system may not qualify for government rebates or grid connection approval. Accreditation also gives you recourse if workmanship fails.
How do installers prevent roof leaks when mounting solar panels?
Installers flash every penetration point with a waterproof sealant and a metal or rubber flashing plate that sits under the tile above and over the bracket. Tiles are then replaced or ground to fit tightly around the mount. This keeps water flowing down the roof surface rather than into the roof cavity.